Our Flint 2 guide put Bondix on a router in sixteen minutes without touching a terminal. This is not that guide.
The MikroTik RB5009 is a different class of machine: rack-mountable, with a proper crypto-capable quad-core CPU, and 2.5GbE plus an SFP+ cage. Getting Bondix onto it means converting it to OpenWrt the hard way, with a one-way flash that wipes RouterOS, done partly from the command line. We did it, we hit every sharp edge so you do not have to, and it works. If you want bonding on serious aggregation hardware and you are comfortable at a terminal, this is worth doing. If you want easy, buy the Flint 2 with Bondix pre-installed and stop reading now. We will not be offended.
Be honest with yourself before you start. Where the Flint 2 is sixteen minutes and no terminal, this is roughly two hours of genuine work and a command line throughout. It is for experienced users. If you are not comfortable at an SSH prompt and reading command output for whether something worked, this is not the guide to learn on. You should expect to break the boot at least once getting there. That is recoverable, but only if you set up MikroTik Netinstall before you begin, which is why it is the very first thing below. Do that, and there is no real risk to the device. Skip it, and you can leave yourself stranded. And if you would simply rather not: the RB5009 with OpenWrt and Bondix pre-installed is £216, and the two hours are ours, not yours.
Read these three things before you start. They will save you an afternoon.
- Use OpenWrt 24.10.0 and only 24.10.0. The Bondix Universal Client currently supports this exact release. Not 24.10.5, not the latest: 24.10.0. This one fact explains most of the failed RB5009 installs you will find online.
- This is a one-way flash. It wipes RouterOS. The only route back is MikroTik Netinstall (covered at the end). Your licence survives in protected flash. Do not do this on a router you need for anything else.
- Stage Netinstall before you begin. Download MikroTik Netinstall and the RB5009 RouterOS package to your PC now, while the router is still healthy, so a mistake is a fifteen-minute recovery rather than a panic.

What you need
- MikroTik RB5009UG+S+IN
- A Windows laptop with an Ethernet port (the boot server we use, Tiny PXE, is Windows)
- Tiny PXE Server on the laptop
- The three OpenWrt 24.10.0 files for the
mvebu/cortexa72target, devicemikrotik_rb5009. Download these exact files; the version number in each link is deliberate, so do not substitute a newer one:- Initramfs (the temporary boot kernel):
openwrt-24.10.0-mvebu-cortexa72-mikrotik_rb5009-initramfs-uImage.itb - Sysupgrade (the permanent image):
openwrt-24.10.0-mvebu-cortexa72-mikrotik_rb5009-squashfs-sysupgrade.bin - U-Boot (note: this lives in the separate
u-boot-rb5009/sub-folder, not the main file list):
u-boot-rb5009/u-boot.elf - Verify the sha256sums against the
sha256sumsfile in that same directory before you use them.
- Initramfs (the temporary boot kernel):
Why 24.10.0 specifically, and why we link it directly: the Bondix client currently runs on this exact release. Newer builds such as 24.10.5 are what most of the failed RB5009 installs online were using. The links above are pinned to 24.10.0 on purpose. If you navigate the downloads server yourself and grab “latest”, you will get the wrong version and the client will not install. Use these.
Critical: rename the files before you use them. OpenWrt’s files download with the version number in the name. You must strip the version number from both the .itb and the .bin, or the install fails at two separate points: Tiny PXE and U-Boot will not pick up a version-named .itb, and sysupgrade will reject a version-named .bin. Rename them the moment you download them:
| Downloaded as | Rename to |
|---|---|
openwrt-24.10.0-mvebu-cortexa72-mikrotik_rb5009-initramfs-uImage.itb | openwrt-mvebu-cortexa72-mikrotik_rb5009-initramfs-uImage.itb |
openwrt-24.10.0-mvebu-cortexa72-mikrotik_rb5009-squashfs-sysupgrade.bin | openwrt-mvebu-cortexa72-mikrotik_rb5009-squashfs-sysupgrade.bin |
u-boot.elf | leave as-is (no version in the name) |
Every filename in the steps below assumes you have already done this.
- The Bondix client package:
Bondix-Client-Universal-1.0.ipk, from your SimpliWiFi portal or supplied by us - Your connection code, from your hosted tunnel account, or your own server and tunnel details if you self-host
- Two WAN sources to bond, but do not plug either in until we tell you to
Part 1: Unlock the bootloader and set it to netboot
The RB5009 will not boot from USB or network until you tell RouterOS to allow it. On current RouterOS this takes two passes, because the boot device is locked behind “device mode” until you enable it and confirm with a power-cycle.
- Unbox the RB5009 and power it on.
- Connect your laptop to port 8.
- Browse to
https://192.168.88.1. It uses a self-signed certificate, so your browser will warn you. Accept it and continue. - The default password is on the label underneath the router. Log in.
- When prompted to change the password, hit Cancel.
Skipping the password is safe here, but only because nothing is connected to the internet yet. There is no WAN plugged in, and RouterOS is about to be wiped anyway. Do not connect an internet source to this router at any point in Part 1 or Part 2. The first thing you plug in comes later, at Part 3.
- Open the Terminal (the button at the top right of WebFig).
- If prompted to view the licence, type n and press Enter.
- If prompted to change the password, press Ctrl+C to skip.
- Enable device mode so the boot device can be changed:
/system/device-mode/update routerboard=yesThis is the step every other guide misses. Without enabling
routerboard=yesdevice mode first, the boot-device change in step 12 silently will not stick, the router never netboots, and it looks for all the world like a bootloader incompatibility. It is not. It is a locked device mode. This single step is why our install worked where others loop. - You now have 5 minutes to reboot the router to confirm the change. A simple power cycle is enough.
- After it reboots, repeat steps 3, 4, 5, 6, 7 and 8 to get back into a terminal.
- Set the boot device to try the network once, then fall back to NAND:
/system/routerboard/settings set boot-device=try-ethernet-once-then-nandUsing
try-ethernet-once-then-nandrather than plainethernetmeans that if the netboot fails, the router falls back to RouterOS instead of hanging. You cannot get stuck.
Part 2: Boot OpenWrt over the network and make it permanent
- Set your PC’s network adapter to a static IP:
- IP: 192.168.88.10
- Subnet: 255.255.255.0
- Gateway: 192.168.88.1
- DNS: 192.168.88.1
- Open Tiny PXE.
- Confirm the IP (option 54) is 192.168.88.10 and Bind IP is ticked.
- Change the boot file to
u-boot.elf(keep it in the same folder as Tiny PXE, alongside the initramfs.itb). - Untick the option “filename if user-class”.
- Click Online in Tiny PXE.
- Move your PC’s network cable to port 1.
- Power cycle the router.
- In the Tiny PXE log you will first see:
doreadfile u-boot.elf - Then you will see:
doreadfile openwrt-mvebu-cortexa72-mikrotik_rb5009-initramfs-uImage.itbIf you see the first request but never the second, the initramfs filename is wrong. Check you renamed it to strip the version number (see the rename table in “What you need”). U-Boot expects exactly
openwrt-mvebu-cortexa72-mikrotik_rb5009-initramfs-uImage.itb, with no version. And if you see nothing at all, the Windows Defender firewall is blocking TFTP, so turn it off on all profiles temporarily. - This takes about 5 minutes and gives you no completion notification. Wait it out.
- Move the PC network cable back to port 8.
- Set the PC network adapter back to DHCP.
- Close Tiny PXE.
- Browse to
https://192.168.1.1(self-signed cert again, so accept and continue). - At the login page, enter username root.
- Leave the password blank and log in.
- A banner warns that no password is set. You are now running OpenWrt in recovery (initramfs) mode, from RAM only. Nothing is written to flash yet.

- Go to the SSH access tab and, under Interface, add LAN. This step is required, not optional. On this initramfs the SSH server does not listen on any interface until you add one here, and without it the SCP and flash commands below are unreachable.
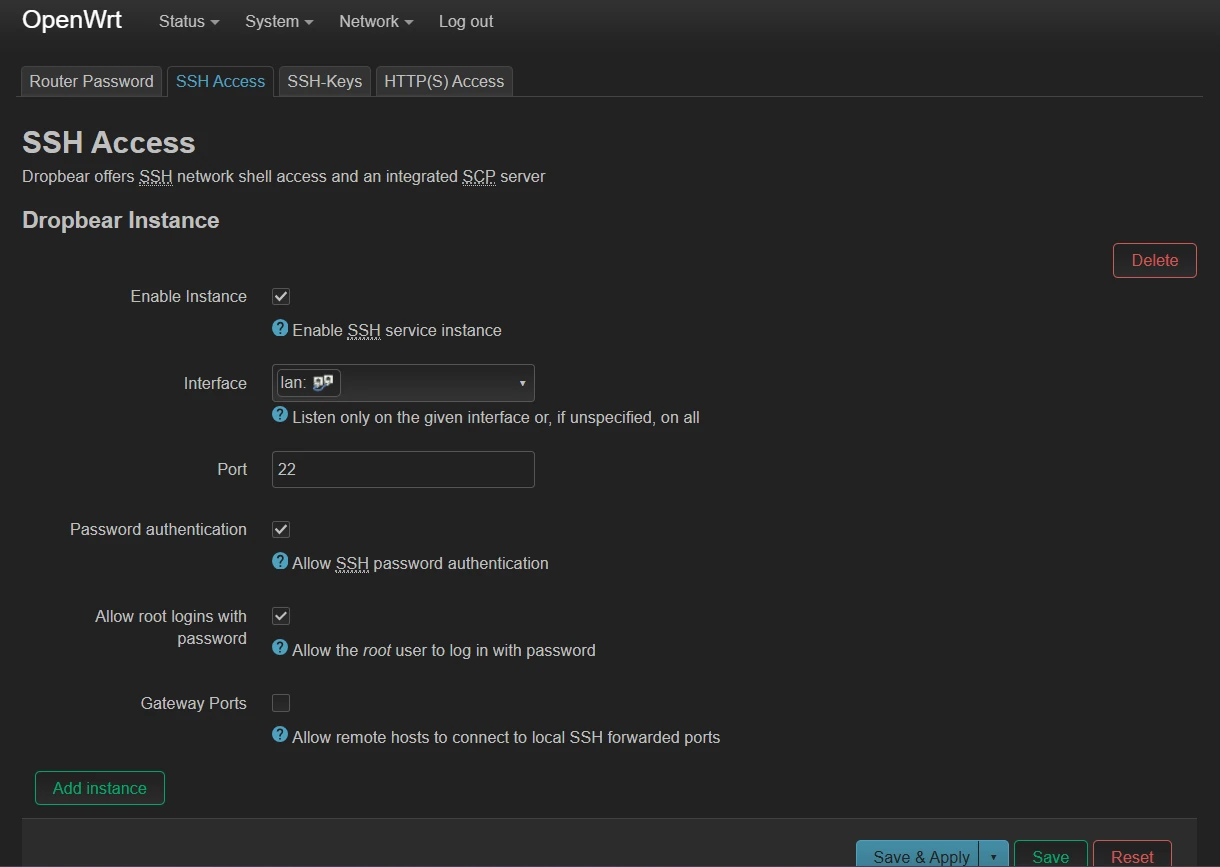
Now copy the two files the permanent install needs,
u-boot.elfand the sysupgrade.bin, into the router’s/tmp. Run the command in the next step from your PC. - From a terminal or PowerShell window on your PC:
scp -O u-boot.elf openwrt-mvebu-cortexa72-mikrotik_rb5009-squashfs-sysupgrade.bin root@192.168.1.1:/tmp/Plain
scpwill fail here with/usr/libexec/sftp-server not found. OpenWrt’s initramfs runs the lightweight Dropbear SSH server, which only speaks the older SCP protocol, and modernscpdefaults to SFTP. The-Oflag (capital O) forces the legacy protocol and fixes it. - SSH into the router (
ssh root@192.168.1.1) and run the conversion. Read each command before running it. This is the irreversible part.No SSH on your PC? Recent versions of Windows include an SSH client in the terminal and PowerShell, but not every install has it. If
sshis not recognised, install PuTTY and connect to192.168.1.1as root with no password. (PuTTY also providespscpfor the copy in the previous step, if your terminal had noscpeither.)First, load the mtd helper functions:
. /lib/functions.shMind the leading full stop and the space. It is
. /lib/functions.sh, where the dot sources the file into your shell. Miss the dot and type/lib/functions.shand you get “permission denied”, which sends you hunting for a permissions problem that does not exist. It is the easiest typo in this whole guide to make and the most confusing to diagnose.Write U-Boot into the YAFFS kernel slot. This is what lets RouterBOOT boot OpenWrt, and it is the step the “easy” guides omit, which is why they boot-loop:
yafut -d /dev/mtd$(find_mtd_index "YAFFS") -w -i /tmp/u-boot.elf -o kernel -TWipe the RouterOS UBI partition:
ubiformat /dev/mtd$(find_mtd_index "ubi") -yFlash OpenWrt (
-nmeans a fresh install, keeping no config):sysupgrade -n /tmp/openwrt-mvebu-cortexa72-mikrotik_rb5009-squashfs-sysupgrade.binIf sysupgrade complains the image is invalid or rejects it, check the
.binfilename. A version number left in the name (...-24.10.0-...) is rejected. It must be the stripped name above. - The final sysupgrade kicks you out of the SSH session. This is expected. Wait a full 5 minutes before trying to reach the router again. The router reboots through RouterBOOT, then U-Boot, then OpenWrt, now from flash.
- Browse to
https://192.168.1.1. - Log in with username root and no password.
- A banner prompts you to set a password. Do it now and note it somewhere.
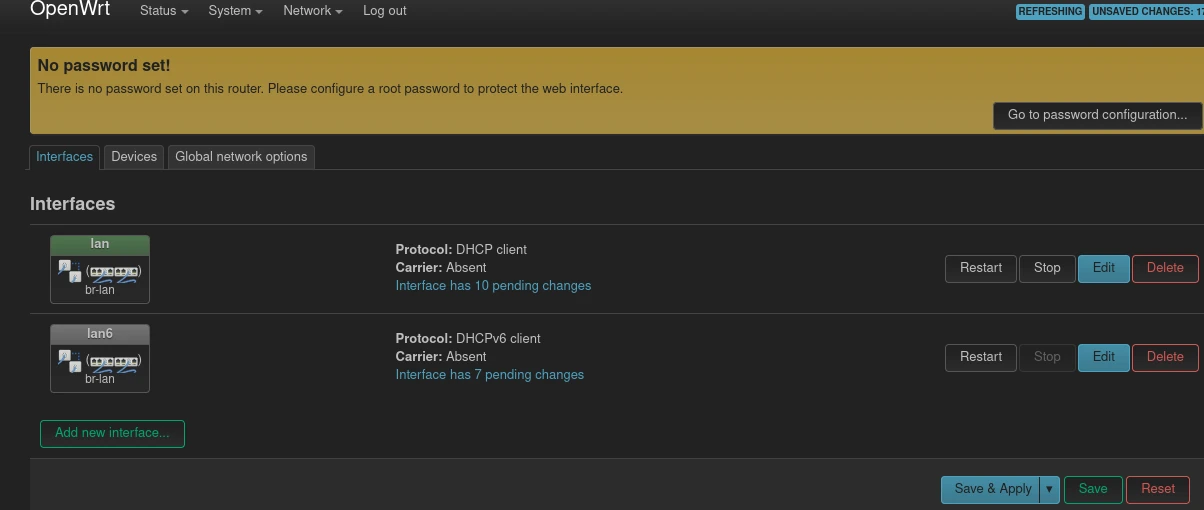
- OpenWrt 24.10.0 is now installed and working on the RB5009.
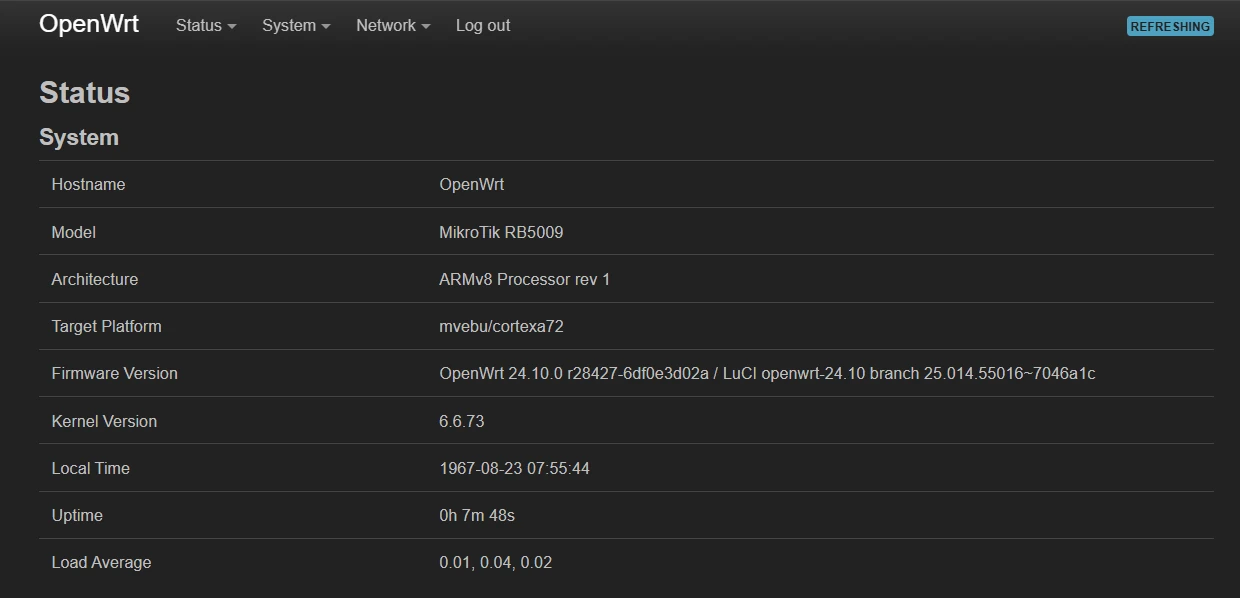
Part 3: Install the Bondix client
- Now plug your internet source into port 1.
- Before installing anything, check the system clock. The Bondix client’s dependencies install automatically over HTTPS, but if the router’s time is out by more than about 5 minutes, the package list update fails with certificate-expired errors.
This is the RB5009’s equivalent of a clock-skew trap: unlike a consumer router with vendor firmware, a fresh OpenWrt install has no preset time, and an out-of-date clock breaks TLS certificate validation on the package servers. Get the time right and the whole dependency install just works.
- Go to System → System → Local Time and check the time zone is correct for your region, including daylight saving.
- Go to System → Software and click Update Lists.
- Confirm the software lists have updated, with no certificate errors.
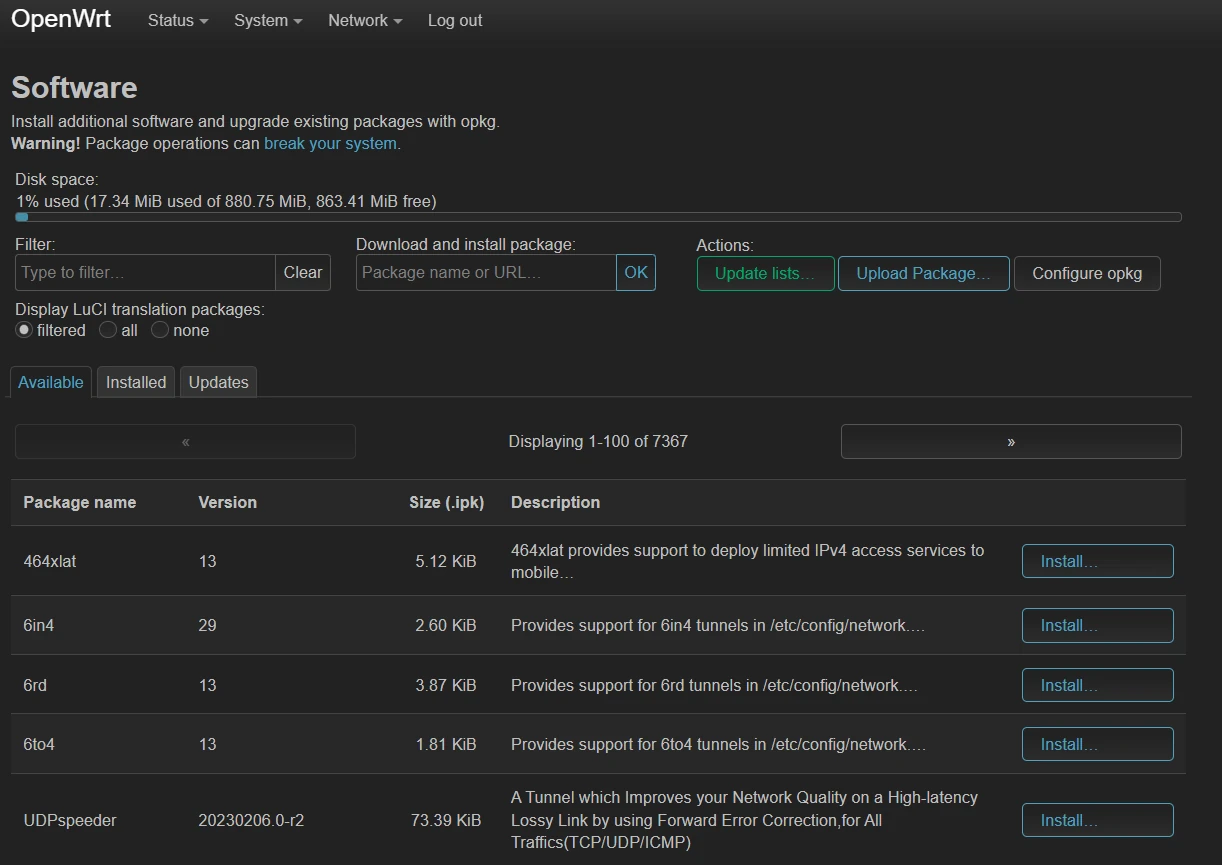
- Click Upload Package…
- Select
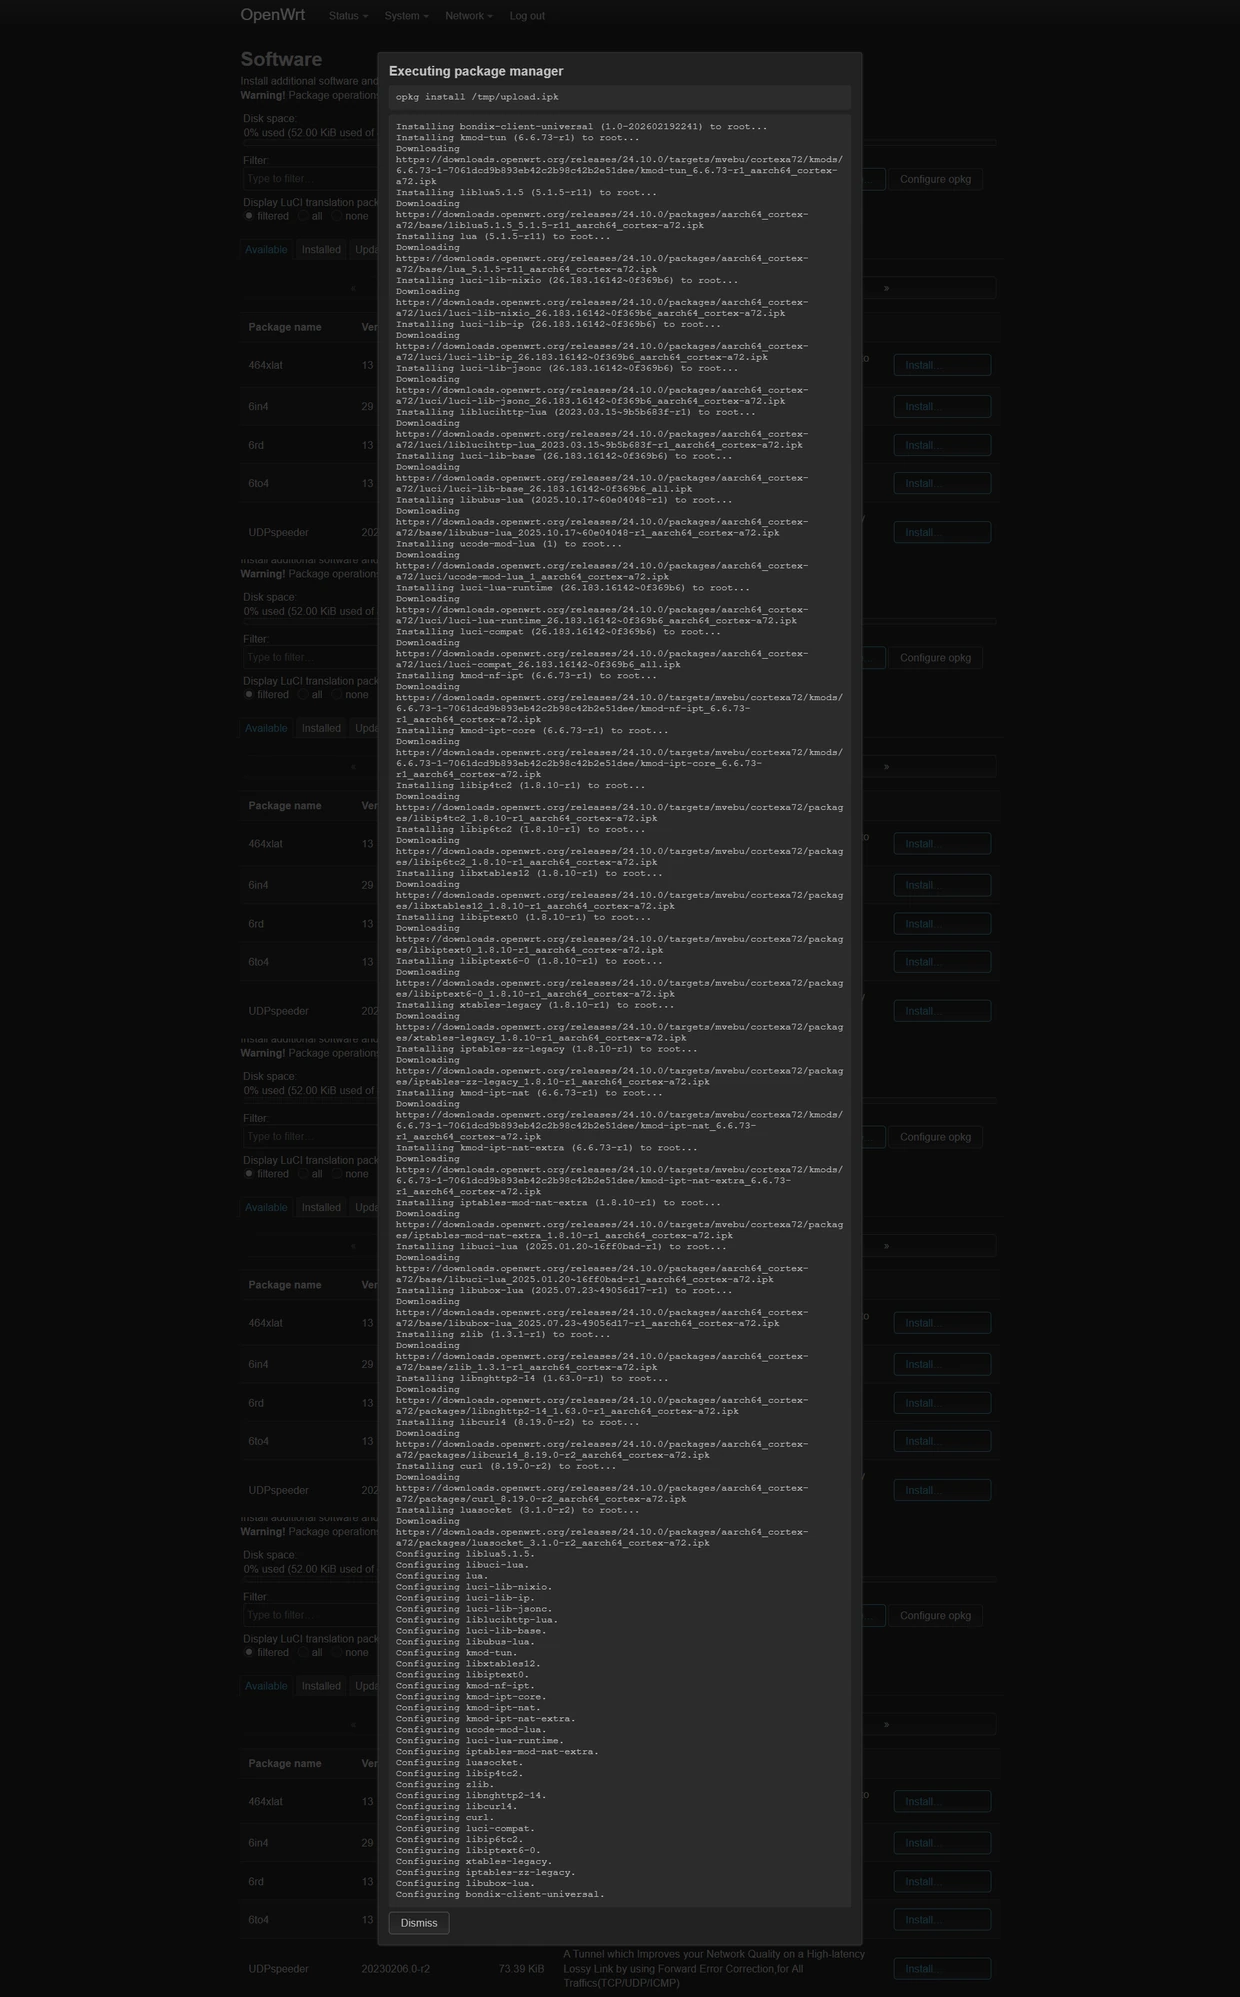
Bondix-Client-Universal-1.0.ipk. - Click Install. Every dependency is pulled and installed automatically, the same behaviour as on the Flint 2, and it works identically on this different CPU.
- Confirm the client is installed under the Installed tab.
- Go to Network → Interfaces, find LAN, and click Edit.
- Under Advanced Settings → Use Custom DNS Servers, add 8.8.8.8 and 8.8.4.4.
This is not needed for the install, since the package lists at step 42 update fine on the default DNS. It matters once you are bonding: some ISPs will not resolve DNS across the tunnel, so pinning public resolvers here avoids a “the bond is up but nothing resolves” problem later. Set it now while you are in here.
- Click Save.
- Click Save & Apply.
- The client is now available under Network → Bondix Bonding, ready for your tunnel details. Paste your connection code (or your own server and tunnel details) and connect.
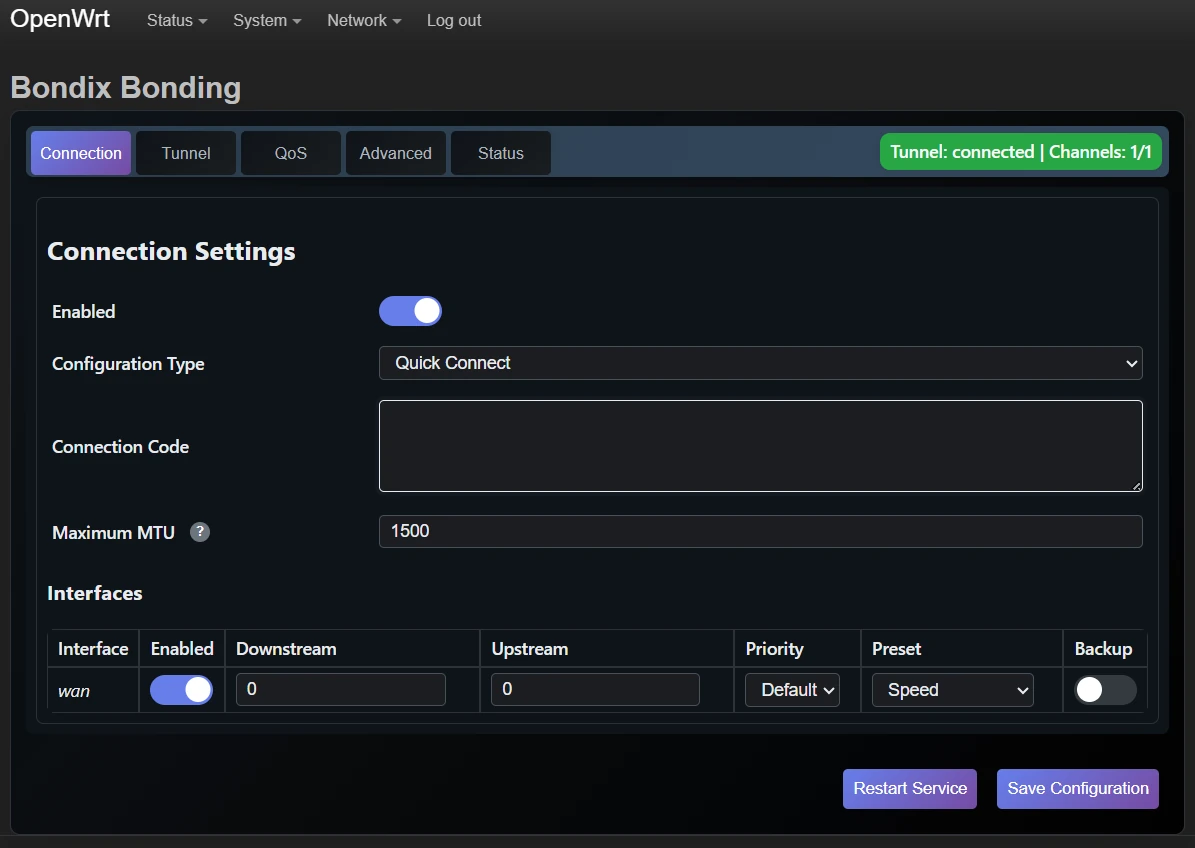
At this point you have one WAN and a live tunnel. Bonding wants at least two, so let us add a second.
Part 4: Add a second WAN port
Out of the box the RB5009’s ports are all in the LAN bridge. To turn one into a second WAN, take it out of the bridge and give it its own interface.
- Go to Network → Interfaces → Devices.
- Find br-lan and click Configure.
- Under Bridge Ports, untick port P2.
- Click Save.
- On the Interfaces tab, click Add New Interface.
- Name it WAN2, Protocol DHCP Client, Device port P2.
- Click Create Interface.
- Click the Firewall tab.
- Assign the firewall zone: wan.
- Click Save.
- Click Save & Apply.
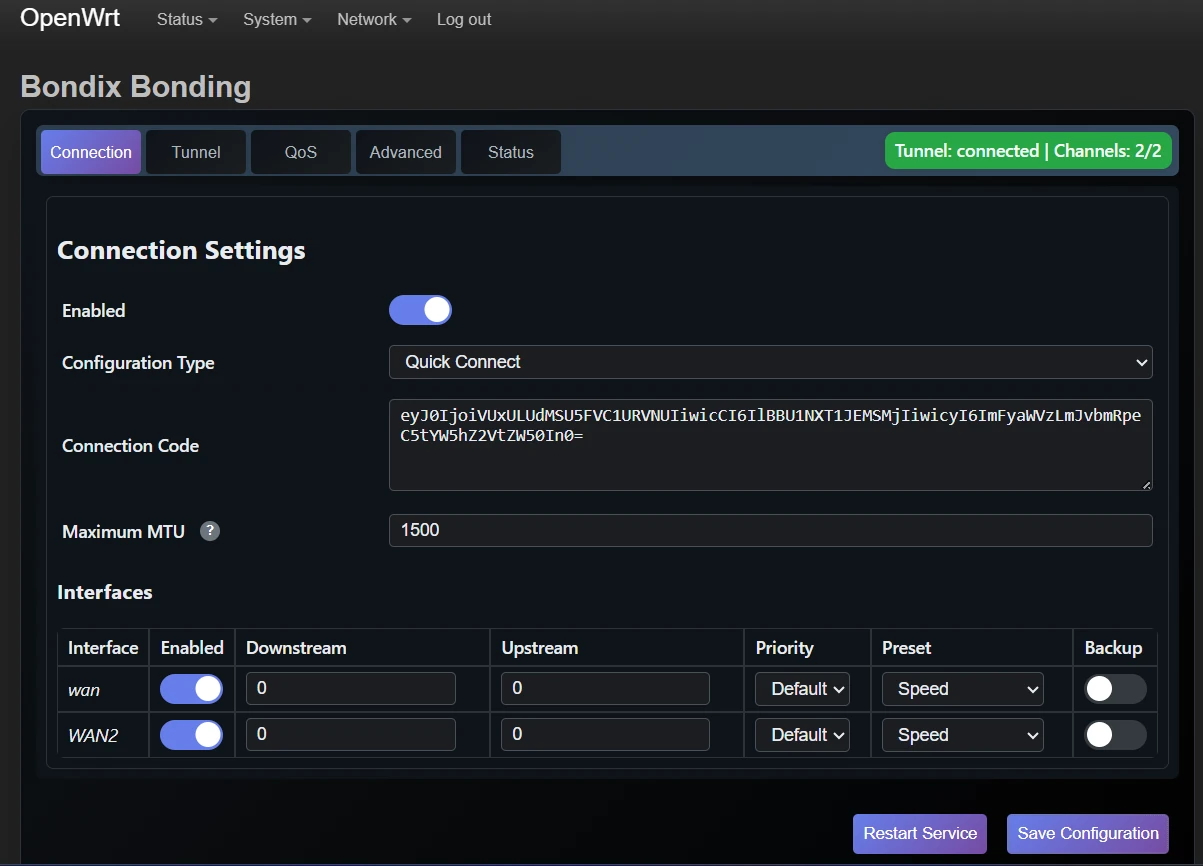
- Go to Network → Bondix Bonding.
- Enable the WAN2 interface.
- Save Configuration.
- Restart the service.
- Plug an internet connection into port 2.
- You now have a second WAN bonded and ready.
Proving it works
We ran the same test as the Flint 2: each connection alone, six runs, recording the range; then bonded, six-run average.
With the same two connections, one fibre and one Starlink Mini, the RB5009 turns in near-identical numbers to the Flint 2, within 1 to 3Mbps either way. That is exactly what you would expect: the bonded throughput is set by the WAN links and the Bondix overhead, not by the router, and both devices have ample CPU for a two-link bond. If two connections is all you are bonding, the Flint 2 does it just as well for less money.
So why reach for the RB5009? Because it does not stop at two. The Flint 2 tops out at two WANs. The RB5009 will bond up to six, and to show what that means, we added a second Starlink Mini as a third WAN:
| Connection | Download | Upload |
|---|---|---|
| Fibre, on its own | 400–440Mbps | 400–420Mbps |
| Starlink Mini #1, on its own | 180–225Mbps | 35–55Mbps |
| Starlink Mini #2, on its own | 190–245Mbps | 45–55Mbps |
| Bonded, 6-run average | 825Mbps | 520Mbps |
That is ~98% of the combined theoretical throughput on download, the ~2.5% Bondix overhead again, exactly as on the Flint 2, now across three links instead of two.
And here the stronger hardware does show: latency on the bond came in at 14ms, against 23ms for the Flint 2 on the same kind of test. That is the one figure where the RB5009 clearly outperforms rather than matches, and it is what you would hope to see from a quad-core router with real headroom for Bondix’s per-packet scheduling: even across three links, more of that work happens without packets waiting in a queue. For latency-sensitive traffic such as voice, live video and remote control, that gap is the aggregation tier earning its keep beyond simply holding more WANs.
The hard part: bonding two Starlinks
The number is impressive, but the more important point is that most equipment cannot do this at all. Every Starlink router hands out the same CGNAT gateway on the same default subnet, so put two on one network and you have two WANs claiming the same next hop and the same address space. Conventional multi-WAN load balancers trip over exactly this: identical gateways, identical subnets, no clean way to tell the two paths apart. Bondix bonds them anyway, and scales past two, which is why the RB5009 is the device for anyone whose bandwidth problem is solved by more dishes rather than a faster line: events, maritime, broadcast, rural, disaster recovery.
About these numbers
Two things worth being straight about, because most bonding benchmarks are not.
Bonding is not free. There is an overhead to encapsulating and scheduling traffic across multiple paths. For Bondix it works out at roughly 2.5%, and you can see it in the table: 825Mbps out of a combined ~840. You will not get the clean arithmetic sum of your connections, and anyone quoting you one is reading a brochure rather than a speedtest.
This is bench testing, and your results will differ. These figures are from our bench, with these connections, on the day. Look at the two Starlink ranges above, both moving 40 to 60Mbps run to run, and that is the honest reality of satellite links. Cellular brings the same variability plus its own latency. What holds regardless is the shape of the result: the connections aggregate at high efficiency, the bond survives a path dropping, and it scales to more links than any consumer router will give you.
If you want to know what bonding will do for your connections specifically, that is a conversation rather than a blog post, so talk to us.
Failover is the other half of the story, and it is far better watched than read. We demonstrate it live in the companion video, pulling a link mid-transfer and showing the session survive.
Recovery: getting back to RouterOS
If you ever need to return the unit to RouterOS, or an install goes wrong, the route is MikroTik Netinstall, which is why we had you stage it at the start.
- Run Netinstall on the PC with the RB5009 RouterOS package loaded. Close Tiny PXE first (two DHCP servers on one wire will fight) and keep the Windows firewall off.
- Set the PC to static 192.168.88.2/24 and cable into port 1.
- Power off the router. Hold the reset button, apply power, and keep holding until the unit appears in Netinstall’s device list (30 to 60 seconds).
- Select it, flash the RouterOS package, and reboot. Your licence survives.
Because RouterBOOT lives in protected flash that a userspace flash cannot touch, this recovery path always works. There is effectively no unrecoverable brick from a bad OpenWrt flash on this device, provided you have Netinstall staged. That is worth knowing before you start.
The one genuine exception: writing a modified RouterBOOT image (some new units may need this to boot OpenWrt, though we did not on 7.23.2). That step overwrites the protected bootloader itself, and a wrong or corrupt image there can brick the unit for real. We did not need it, and you should avoid it unless the standard netboot genuinely will not work.
Verdict
Here is the honest comparison with the Flint 2: on two connections, the RB5009 bonds no faster. Same numbers, within a rounding error. If two WANs is your world, buy the Flint 2 and save the money and the two hours.
The RB5009 earns its place when you need more than two links. It bonds up to six, and it will happily bond multiple Starlinks together, which almost nothing else will do cleanly. It also holds latency lower under load: 14ms on our three-link bond against the Flint 2’s 23ms, the CPU headroom showing where it matters for voice and live video. That is the aggregation tier: not faster per link, but wider, lower-latency under load, rack-mountable, with an SFP+ cage and the headroom to run a serious number of paths at once. For events, maritime, broadcast, rural and disaster-recovery work, that breadth is the whole game.
Getting Bondix onto it costs you a one-way flash and a couple of hours at the terminal, but every trap is mapped above, and there is a guaranteed way back if you stage Netinstall first. If that trade makes sense, this is how it is done. If it does not, we sell it ready to run, or the Flint 2 is the same client on easier hardware.
Need a Bondix server to bond to?
We host them in the UK, and we are Bondix’s own authorised hosted solutions partner. Hosted Bondix from £20/month, and you just connect your router.
View Bondix HostingOr start with a free 48-hour Bondix trial and connect your router to one of our servers first: no commitment, full bonding, real UK infrastructure.
SimpliWiFi is Bondix’s authorised hosted solutions partner and official Bondix & Teltonika distributor in the UK & EU.